Feature update: Field & ball position
Published: June 24, 2026
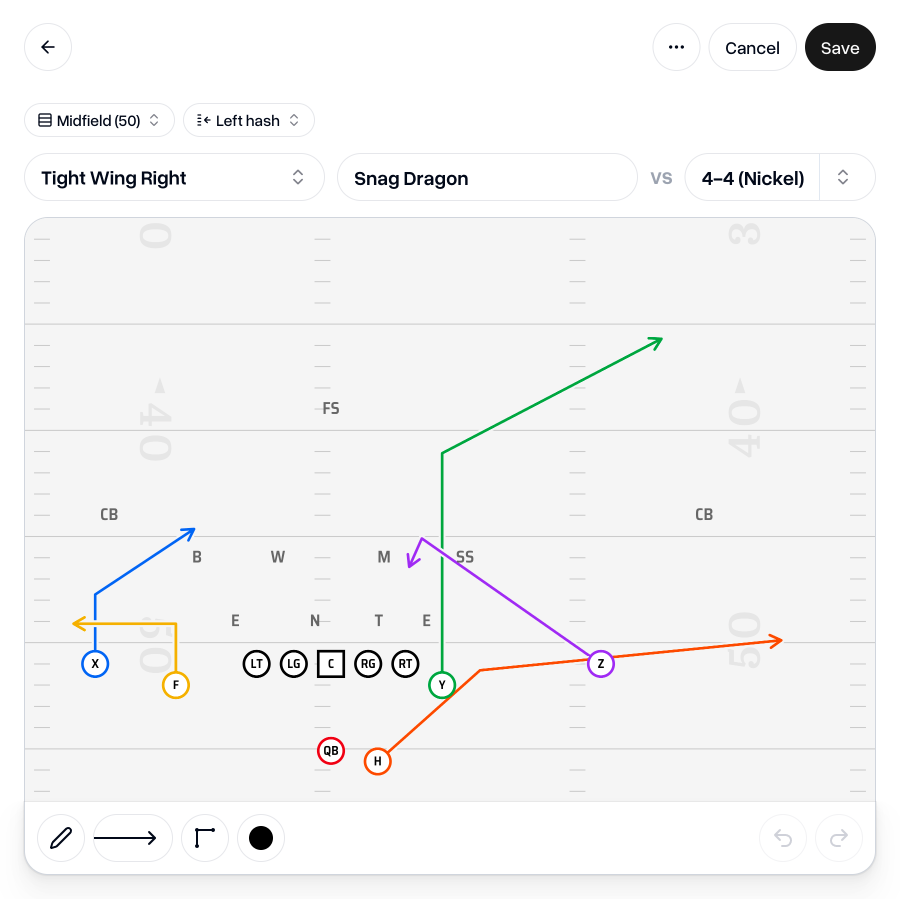
Not all field positions are created equal. Your game plan will likely differ drastically depending on whether you're on the Left Hash in the Red Zone or whether you're backed up in the middle of the field on your own 5 yard line.
So we've made it easier to show exactly how you plan on moving the ball from different field positions and hash marks.
Field position
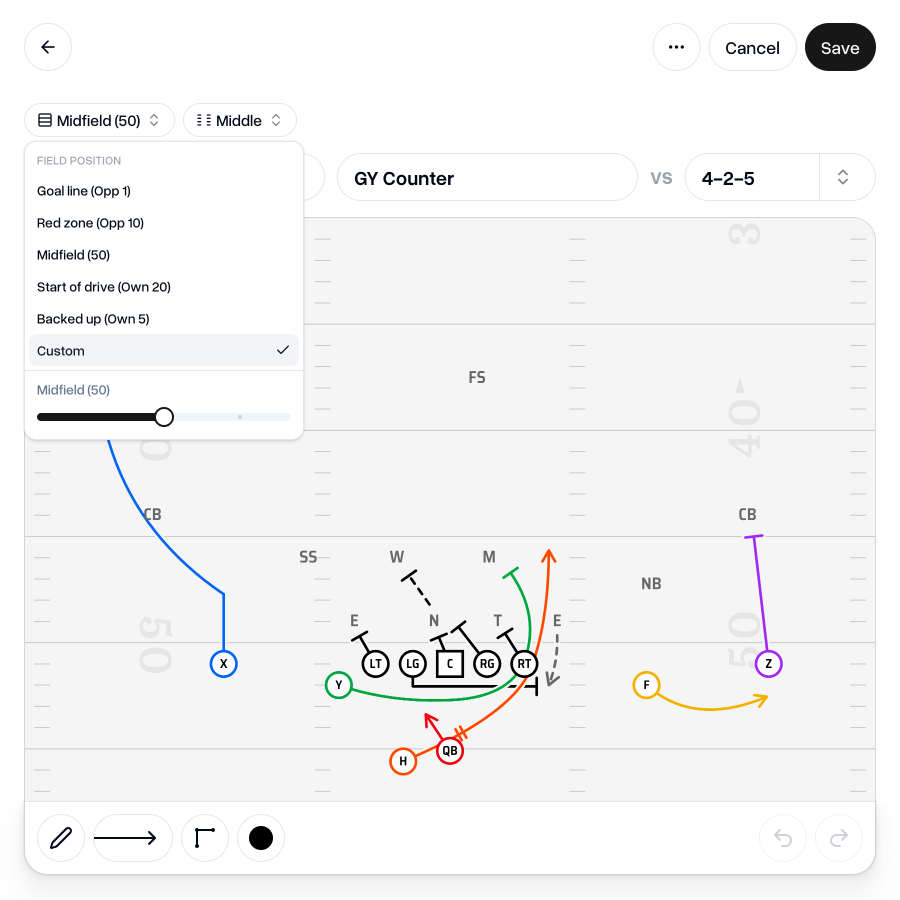
When creating or editing a play, you now have the ability to choose a yard line for that play.
There are a few preset options to quickly switch between, including Goal Line, Red Zone, Midfield, Start of Drive, and Backed Up.
You can also select "Custom" and then choose any yard line you'd like using the slider.
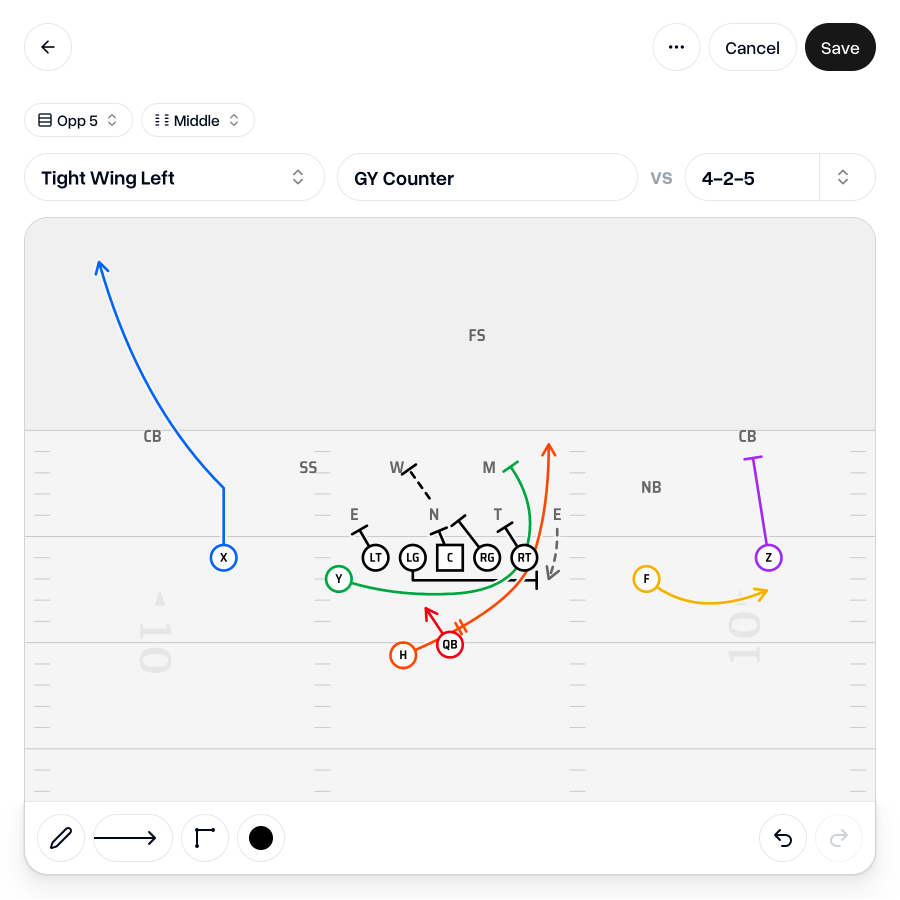
Inside the opposition's 10 yard line, the offensive formation will move up the canvas, and the defensive formation will automatically compress itself to fit on the canvas in the available space.
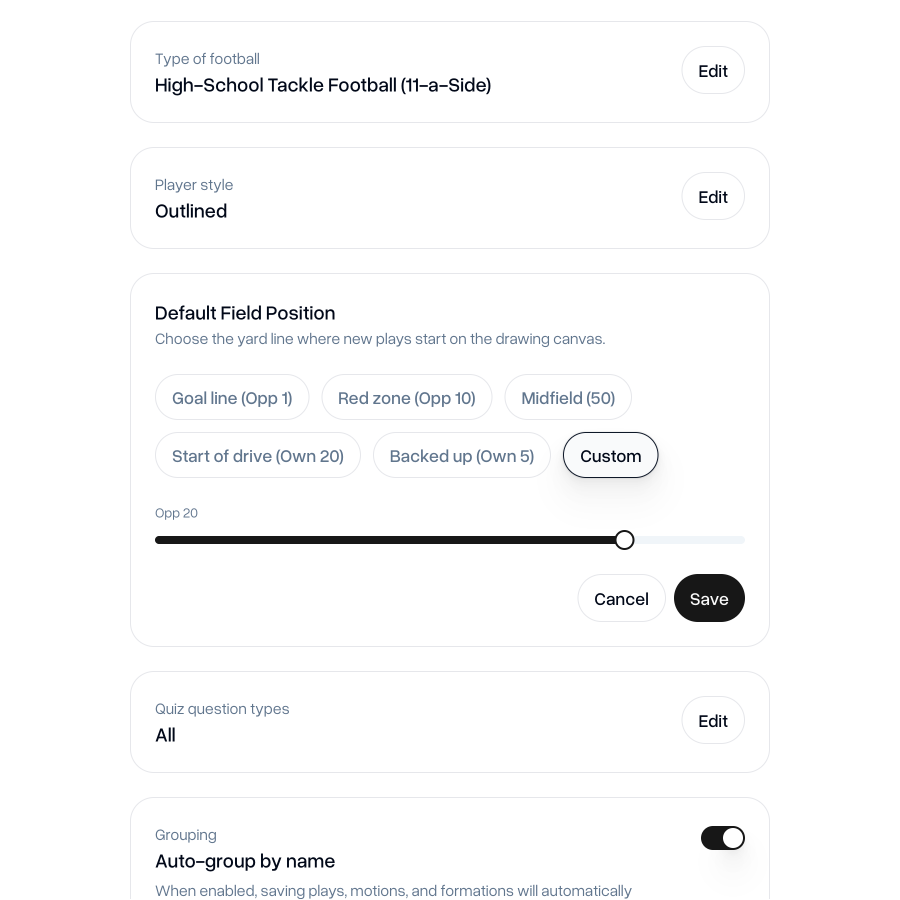
By default when creating a new play, you will be positioned on your own 20 yard line. If you'd like to change the default starting position, you can do so from your team's settings page.
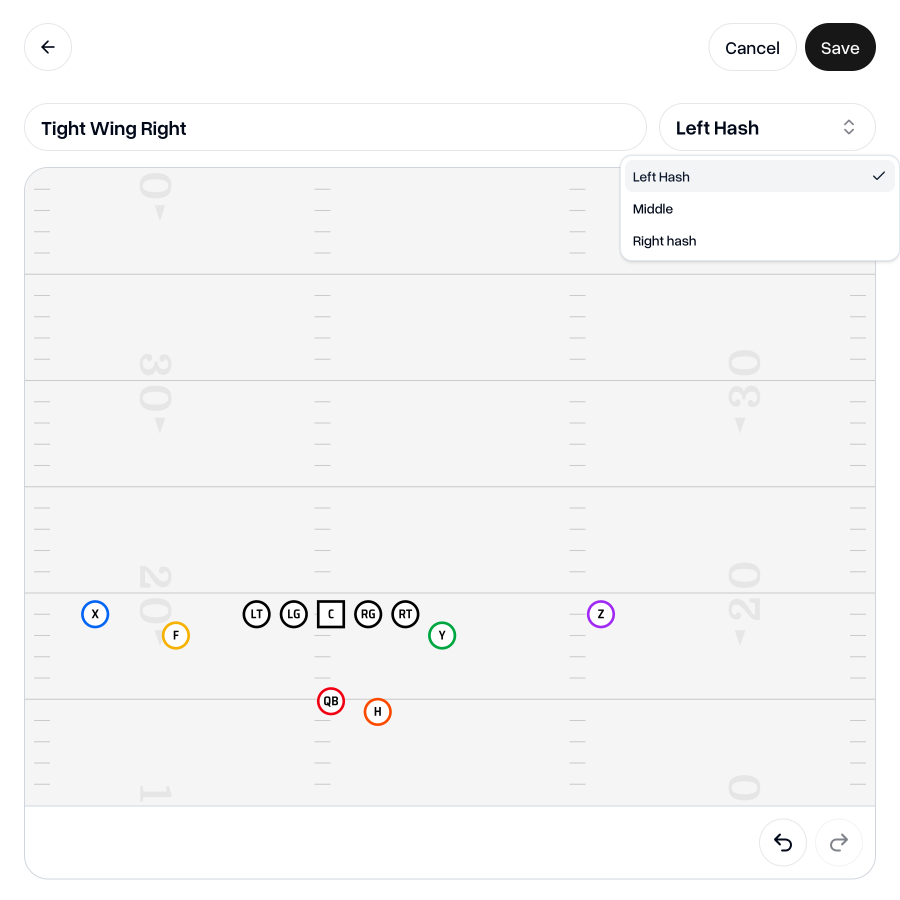
Ball position (Moving to the hash marks)
Like field position, you can also now re-adjust the position of your play to the hash marks directly from the play.
This means you don't need to disconnect the formation or create a separate formation to adjust the position of the ball.
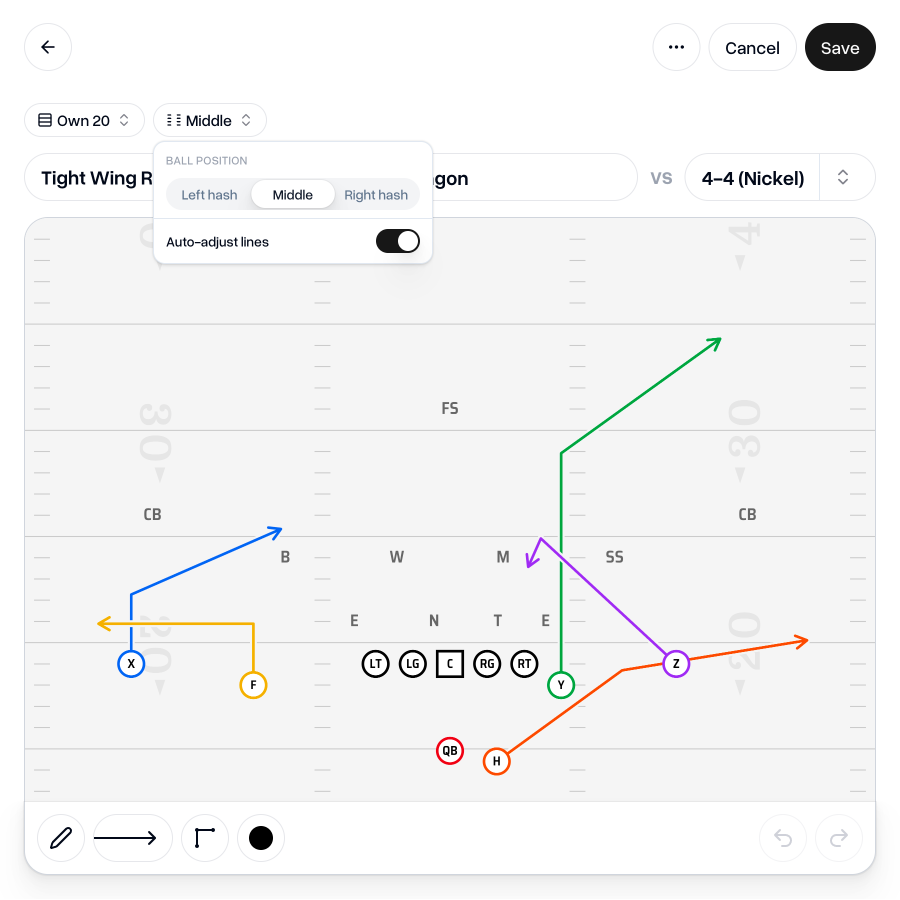
Play Designer Pro will automatically adjust the position of players, moving players close to the tackle box with the ball whilst players out wide are adjusted to keep their position relative to the edge of the tackle box and the sideline. Boundary-side splits are squeezed down and the field-side spacing is spread out.
If you'd like more control over the exact adjustments you'd like to make when moving the ball to a hash mark, you can still create a new formation, choose your ball position and then you can make fine adjustments to the position of your players.
Then, when you use that formation in a play and choose the same ball position as the formation template you created, it will use your version rather than adjusting it automatically.
Go to my teamAs always, if you have any feedback, questions or ideas for improvements, don't hesitate to reach out at aaron@playdesignerpro.com or via the live chat on the site.
— Aaron, Founder of Play Designer Pro